Machine Recycling Discussion and Moderated Newsgroup > Full Machines
> Complete Machines
> Metalworking
> South
> New zebra muscle coalescer deluxe w/ filters ZEF15DF
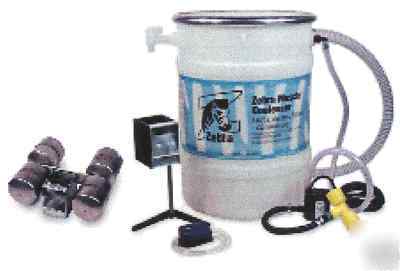
New zebra muscle coalescer deluxe w/ filters ZEF15DF
Zebra Muscle Coalescer Deluxe with Filter zef15df
Continuously cleans, filters, and aerates to prevent rancidity
Circulates static sumps which tend to degrade more quickly
How the Zebra Muscle Coalescer Works
1. Dirty coolant is brought in by the intake attachment and travels through this fitting to the Fine Stopper on F15DF models.
2. The Fine Stopper (F15DF model) gathers any chips that are brought in with the dirty coolant through the intake attachment. These chips are mainly the ones that float with the tramp oil layer.
3. The coalescing media increase the internal surface area of the barrel fivefold to coalesce the oil droplets.
4. The coolant then travels through the coalescing cartridge, whereby the tiny oil droplets cling to the coalescing media. Once large enough, they then rise out of the coolant, traveling above the perforated plate atop of the coalescing cartridge for manual discharge.
5. The Internal Oil Discharge Skimmer (IODS) gathers the oils for virtually coolant-free discharge.
6. Clean coolant is returned from the bottom of the Muscle through this pipe.
7. The drum dolly provides for easy maneuverability of the coolant-filled Muscle during machine maintenance
Coolant, wash, or wastewater below 100 F
When low maintenance is preferred
Sumps that run 12 hours or less per day
Sumps with consistent rancidity issues
Muscle Coalescer Body Selection:
The first step in selecting the proper Muscle Coalescer is to choose the body style which will best suit your application
Water-Soluble Oils Semi-Synthetics
Cast Iron Aluminum Magnesium AISI/SAE Steel
Brass Lead Copper Ultra Alloys Stainless Steel
Oil Separation Considerations:
The Muscle has a hold time of 15 minutes, and with its coalescing media, will be able to separate tramp oil which naturally gravity separates in 20 minutes or less. To determine the amount of tramp oil that will naturally gravity separate in 20 minutes, you will need to take a miniature separation test for each sump.
Using a clean, clear plastic pop bottle, for instance, dunk it in from the top of the sump to the bottom for a cross section of the solution. Cap the bottle off and shake it vigorously for 10-15 seconds. Then let it stand to naturally reject the tramp oil while timing the process. Whatever tramp oil separated in 20 minutes will be the amount that the Muscle will be able to remove from that sump.
Add on high-pressure coolant delivery systems cause tramp oils to deeply emulsify into the base coolant because of the pressurization of the solution. During the separation test, you may see mostly a separated inverse layer, somewhat like a milkshake. This may be the only separation, yet this layer is still best removed. If using a coalescer, it is recommended to run the coalescer only when the machines pumps are not operating, whenever possible, for the best effectiveness.
To note, as coolant ages, and the more base oil there is in your coolant, tramp oils will take a longer time to gravity separate. You may find that older sumps take longer for the oils to separate. However, if you were to use the coalescer from the first day of a recharge, it will remove the tramp oil effectively.
The standard electric centrifugal pump will also be placed in the sump, and measures 3.5 x 4.0 x 3 . However, if there is no room for it, then it may be placed outside of the sump, below the fluid level, and connected with fluid tight connectors through the sump wall.
The Muscle, with the standard pump, has its limitations in regards to it being utilized to service multiple sumps. Since the pump is not designed to handle excessive air intake, it will perform better and last longer if it is kept primed with fluid during re-installations between machines. We recommend using it for no more than 3-5 machine sumps. For use on more than 5 sumps, it is best to upgrade to a diaphragm pump, which is then mounted to the top of the Muscle barrel.
Muscle Coalescer Intake Attachment Selection
The second step is to select the appropriate tramp oil intake attachment. Choose on that will fit in the sump, is appropriate for the depth and surface area of the tank, and its level fluctuation. Keep in mind the attachment should be placed in the location where the oil normally collects due to the sump turbulence. For baffled sumps, it is possible to incorporate two attachments using a Y-fitting off the intake port of the pump.
Other considerations include chip screening. The chip screen will prevent hoses and fittings from blocking if there are large floating chips, such as in aluminum turning applications.
May be installed w/o stand Included
Pump rides w/ frame good for below ground sumps
The oil intake hose and the clean coolant discharge hose are both standard at 4 length. These lengths can be customized if necessary for the installation.
Determine where the intake attachment/pump assembly will be installed, then measure from the pump to where the barrel will be placed. If this is a below-ground tank, then you also need to measure from the barrel inlet fitting to the lowest liquid level to determine the intake hose length needed. This hose can be customized to 15 .
Now determine where the clean coolant return hose will be installed. It is best to place this end as far away from the intake as possible, directing the flow of surface oil to the intake attachment.

